Posts Tagged: Insert Coupling
How is an Insert Coupling installed between two shafts, and what steps are involved in the installation process?
The installation of an Insert Coupling between two shafts involves a straightforward process.
Here are the steps typically involved in installing an Insert Coupling:
- Prepare the Shafts: Ensure that both shafts are clean and free of any contaminants. Remove any rust, burrs, or debris that might hinder a proper fit.
- Select the Appropriate Insert Coupling: Choose an Insert Coupling that matches the shaft diameters, torque requirements, and other specifications of your application.
- Place the Hubs on the Shafts: Slide the hubs of the Insert Coupling onto the shaft ends. The hubs have a central bore that fits over the shafts. Make sure the hubs are positioned at the desired location on each shaft.
- Align the Shaft Ends: Ensure that the shaft ends are properly aligned. Misalignment can be detrimental to the function and longevity of the Insert Coupling. The shafts should be as straight and parallel as possible.
- Install the Insert: The Insert Coupling typically consists of a flexible, elastomeric insert (e.g., spider or jaw) that goes between the hubs. Place the insert into the cavity between the hubs. The specific design of the insert may vary depending on the type of Insert Coupling.
- Secure the Hubs: Use the provided set screws or clamping mechanisms to secure the hubs to the shafts. Tighten these fasteners to the manufacturer’s recommended torque specifications. It’s important not to over-tighten, as this could damage the insert or cause premature wear.
- Verify Alignment: After the hubs are securely attached to the shafts, verify that the shafts remain aligned. Make any necessary adjustments to ensure proper alignment.
- Check for Proper Fit: Ensure that the insert is properly seated within the hubs and that there is no play or movement. If the insert is not seated correctly, disassemble and reposition it as needed.
- Lubrication (if necessary): Some Insert Couplings may require lubrication of the insert or the hubs. Consult the manufacturer’s recommendations for the type and amount of lubrication, if necessary.
- Final Inspection: After installation, perform a final visual inspection of the Insert Coupling and the entire system. Ensure that there are no loose fasteners, misalignment, or abnormalities.
- Operational Test: Run the machinery or system to verify that the Insert Coupling functions as expected. Pay attention to vibrations, noise, and any signs of misalignment. Address any issues that arise during testing.
- Regular Maintenance: As part of regular maintenance, periodically check the Insert Coupling for wear, misalignment, and proper tightness of set screws or clamping mechanisms. Replace the insert or perform any necessary maintenance tasks to maintain optimal performance.
Proper installation is essential to ensure the reliability and longevity of the Insert Coupling. It’s important to follow the manufacturer’s guidelines and recommendations for your specific Insert Coupling type, as different designs may have variations in installation procedures.
What are the key components and design features of an Insert Coupling that allow it to function effectively in mechanical systems?
The key components and design features of an Insert Coupling are critical to its effective functioning in mechanical systems. These features enable Insert Couplings to connect two shafts in a way that allows for torque transmission while accommodating slight misalignments and dampening shock and vibrations. Here are the key components and design features:
- Hubs: Insert Couplings consist of two hubs, one attached to each of the two shafts to be connected. The hubs are designed to provide a secure and rigid connection to the shafts. They typically have a bore that fits over the shafts.
- Insert: The insert is a flexible, elastomeric component that is placed between the two hubs. The insert’s design varies depending on the type of Insert Coupling (e.g., spider or jaw insert). The insert is the component responsible for transmitting torque and compensating for slight misalignments.
- Spider or Jaw: The insert is often referred to as a “spider” or “jaw.” These terms describe the shape and design of the insert. Spiders have multiple legs that provide flexibility and damping, while jaws have curved elements that grip the hubs securely. The choice of insert type depends on the specific application’s requirements.
- Lugs: Some Insert Couplings, particularly jaw-type couplings, may feature lugs on the hubs and the insert. The lugs are designed to interlock, creating a secure connection and transmitting torque efficiently.
- Fasteners: Insert Couplings may include set screws or clamping mechanisms that are used to secure the hubs onto the shafts. Insert Coupling These fasteners are tightened to ensure a firm attachment, preventing slippage during operation.
- Alignment Features: Insert Couplings often have alignment features or marks that assist in aligning the hubs and the shafts correctly. Proper alignment is crucial to the coupling’s performance and the longevity of the machinery.
- Material: Insert Couplings can be made from various materials, including steel, aluminum, and other alloys. The choice of material depends on factors such as the torque requirements, environmental conditions, and the specific application.
- Design for Shock Absorption: Many Insert Couplings are designed with features that allow them to absorb shock and dampen vibrations. This is particularly important in applications where machinery may be subjected to sudden loads or where smooth and stable operation is required.
- Misalignment Tolerance: Insert Couplings are designed to accommodate some degree of angular and parallel misalignment between the two shafts. The amount of misalignment tolerance varies depending on the specific coupling design and type of insert used.
- Easy Maintenance: Some Insert Couplings are designed for easy maintenance, allowing for quick disassembly and reassembly without the need for special tools or equipment.
- Configurations: Insert Couplings come in various configurations to meet specific application needs, including single-flex, double-flex, and spacer types. The choice of configuration depends on factors like the amount of misalignment and torque requirements.
These components and design features work together to create a reliable and effective connection between two shafts, allowing for the transmission of torque while compensating for misalignments and providing shock and vibration absorption. The specific design and materials of the Insert Coupling can vary based on the application’s demands.
How does an Insert Adaptor create a reliable and leak-free connection between a PE pipe and another pipe material?
An Insert Adaptor creates a reliable and leak-free connection between a polyethylene (PE) pipe and another pipe material by using a combination of design features and a secure attachment method.
Here’s how it achieves a dependable connection:
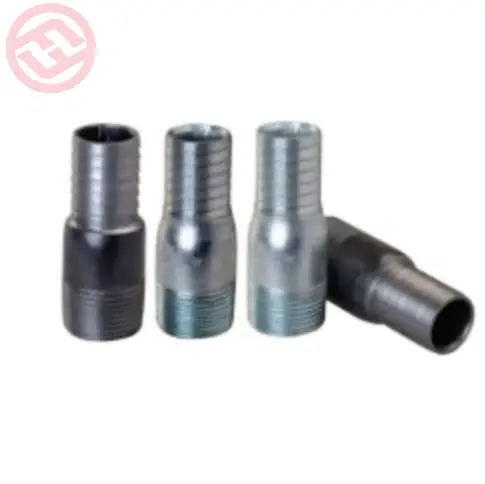
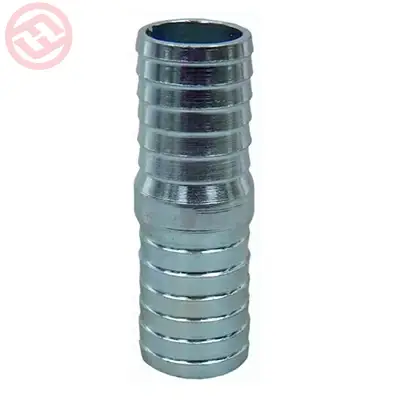
- Barbed or Ribbed Design: The Insert Adaptor typically has a barbed or ribbed design on one end. This design is essential for securely gripping the PE pipe. The barbs or ribs provide multiple points of contact, ensuring a tight and secure fit. The shape and spacing of these barbs or ribs are carefully engineered to maximize grip and prevent the PE pipe from slipping off.
- Watertight Seal: On the other end of the Insert Adaptor, there is a threaded or compression connection. This end is designed to connect to the other pipe material, which could be metal, PVC, or another material. The threaded or compression end incorporates sealing mechanisms, such as O-rings or gaskets, that create a watertight seal between the Insert Adaptor and the other pipe material. This seal prevents any leakage or seepage of fluids.
- Secure Attachment: The Insert Adaptor is typically installed by first sliding the PE pipe onto the barbed end. The barbs or ribs grip the PE pipe firmly, preventing it from slipping off during operation. Then, the threaded or compression end is securely attached to the other pipe material, completing the connection. The tight connection and sealing mechanism ensure that no fluid can escape the joint.
- No Welding Required: Unlike welding, which can be a complex and time-consuming process, Insert Adaptors eliminate the need for hot work. This not only simplifies the installation process but also reduces the potential for weld-related defects or errors that might lead to leaks.
- Ease of Installation: The installation of an Insert Adaptor is relatively straightforward and can often be carried out with standard plumbing tools. Insert Adaptor This ease of installation further contributes to the reliability of the connection, as it reduces the likelihood of errors during the installation process.
- Flexibility and Adaptability: Insert Adaptors can be used in various applications and projects where polyethylene pipes need to be connected to different pipe materials. Their flexibility and adaptability make them suitable for a wide range of plumbing and piping systems.
Overall, the combination of the barbed or ribbed design for secure attachment to the PE pipe and the sealing mechanism for the connection to the other pipe material ensures a reliable, leak-free connection when using an Insert Adaptor in a plumbing or piping system.
What factors should be considered when selecting the appropriate size and type of Insert Adaptor for a specific plumbing project?
Selecting the appropriate size and type of Insert Adaptor for a specific plumbing project is essential to ensure a reliable and leak-free connection. Several factors should be considered when making this choice:
- Pipe Size: The size of the polyethylene (PE) pipe and the pipe material you are connecting to with the Insert Adaptor are crucial. The Insert Adaptor should be compatible with the diameters of both pipes. Ensure that you choose an Insert Adaptor with the correct size to match the PE pipe as well as the other pipe material.
- Connection Type: Determine whether you need a threaded or compression-style Insert Adaptor. The choice often depends on the type of connection the other pipe material provides. Ensure that the Insert Adaptor’s connection type matches the requirements of your project.
- Material Compatibility: Consider the material of the Insert Adaptor. Common materials include brass, stainless steel, and high-density polyethylene (HDPE). Select an Insert Adaptor material that is compatible with the fluids or gases being transported and the other pipe material to prevent corrosion or material incompatibility issues.
- Pressure Rating: Ensure that the selected Insert Adaptor has an appropriate pressure rating for the specific application. The pressure rating should match or exceed the maximum pressure the system will experience.
- Temperature Range: Consider the temperature range of your plumbing system. Different materials have varying temperature tolerances. Ensure that the Insert Adaptor material can withstand the temperature conditions of your project without deformation or failure.
- Application Type: Consider the specific application for which the Insert Adaptor will be used. For example, in potable water systems, you may need to ensure that the materials are safe for drinking water. In industrial settings, the materials should be compatible with the transported substances.
- Environmental Conditions: Evaluate the environmental conditions of the installation location. If the plumbing system is exposed to harsh weather, chemicals, or corrosive substances, choose an Insert Adaptor that can withstand these conditions.
- Certifications and Standards: Verify that the Insert Adaptor complies with industry standards and regulations. Look for relevant certifications, such as those from NSF International for drinking water systems or industry-specific standards.
- Ease of Installation: Consider the ease of installation, especially if the project requires a quick or efficient setup. Some Insert Adaptors come with features that simplify the installation process.
- Cost: While cost is a factor, it should not be the sole determinant. Balance the cost of the Insert Adaptor with its suitability for the project, ensuring that you select a fitting that meets the necessary requirements.
- Supplier and Manufacturer: Choose a reputable supplier and manufacturer of Insert Adaptors. Reliable manufacturers often provide higher-quality products, and established suppliers can offer support and guidance in selecting the right components.
- Future Maintenance: Consider the ease of future maintenance or modifications to the plumbing system. If you anticipate changes or repairs in the future, a flexible and adaptable Insert Adaptor may be preferable.
By carefully considering these factors, you can select the most appropriate size and type of Insert Adaptor for your specific plumbing project, ensuring that it provides a secure and leak-free connection.