What is the maximum duration the water cannon can operate continuously?
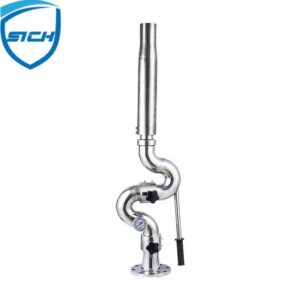
The maximum duration that a water cannon can operate continuously depends on several factors including its design, capacity, power source, and operational conditions.
In general, water cannons used for firefighting purposes are designed to operate continuously for extended periods to effectively combat fires. However, the actual duration of continuous operation can vary significantly based on factors such as:
- Water supply: The availability of water, whether from a municipal supply, dedicated water tank, or other sources, can impact how long the water cannon can operate continuously.
- Power source: The power source used to operate the water cannon, such as a vehicle’s engine or an independent generator, water cannons for fire fighting can influence its continuous operating time.
- Efficiency and cooling: Some water cannons may have mechanisms for cooling or efficiency optimization to prolong continuous operation without overheating or mechanical failure.
- Environmental conditions: Factors such as ambient temperature, humidity, and operating environment (e.g., exposure to extreme heat or cold) can affect the performance and operating time of the water cannon.
- Maintenance and reliability: Regular maintenance, proper care, and reliability of components can contribute to the water cannon’s ability to operate continuously without interruptions.
In general, water cannons used for firefighting are designed to withstand prolonged use during emergency situations. However, specific information on the maximum duration of continuous operation would be provided by the manufacturer or detailed in the equipment specifications for a particular model.
How do you ensure proper labeling and packaging of the finished automatic plastic lid capping applicator?
Ensuring proper labeling and packaging of the finished automatic plastic lid capping applicator involves several steps to maintain product integrity, compliance with regulations, and customer satisfaction.
Here’s how to ensure proper labeling and packaging:
- Labeling Compliance: Ensure that the labeling of the automatic plastic lid capping applicator complies with regulatory requirements and industry standards. This includes providing accurate product information, such as product name, specifications, usage instructions, and safety warnings.
- Quality Control: Implement quality control measures to verify that the labeling and packaging materials meet quality standards. Inspect labels for clarity, legibility, and adherence to packaging surfaces. Conduct regular checks to ensure that labels are applied accurately and securely to the product.
- Label Placement: Determine the optimal placement of labels on the automatic plastic lid capping applicator to ensure visibility, readability, and functionality. Place labels in prominent locations where they can be easily seen and accessed by users without obstructing product features or functionality.
- Packaging Design: Design packaging materials that protect the automatic plastic lid capping applicator during storage, transit, and handling. Choose packaging materials that are durable, lightweight, and environmentally friendly. Consider factors such as moisture resistance, impact protection, and tamper-evident features.
- Packaging Assembly: Assemble packaging materials according to established procedures and specifications. Ensure that packaging components, such as boxes, trays, or pouches, are correctly sized and configured to accommodate the automatic plastic lid capping applicator securely.
- Sealing Integrity: Verify the integrity of packaging seals to prevent contamination, tampering, or damage to the product. Use heat sealing, automatic plastic lid capping applicator adhesive bonding, or other sealing methods to create secure closures that maintain product freshness and integrity.
- Batch Identification: Implement a system for batch identification and traceability to track the production, packaging, and distribution of automatic plastic lid capping applicators. Assign unique batch numbers or codes to each batch of products for easy identification and traceability.
- Labeling Accuracy: Ensure the accuracy of labeling information, including product descriptions, ingredients, expiration dates, and batch numbers. Use automated labeling systems or barcode technology to reduce the risk of human error and improve labeling accuracy.
- Regulatory Compliance: Stay informed about regulatory requirements and industry guidelines governing labeling and packaging of the automatic plastic lid capping applicator. Ensure compliance with regulations related to product labeling, safety standards, and packaging materials.
- Customer Requirements: Consider customer preferences and requirements when designing labeling and packaging for the automatic plastic lid capping applicator. Incorporate branding elements, logos, or customized messaging to enhance product presentation and appeal to target audiences.
- Documentation and Records: Maintain detailed records of labeling and packaging processes, including equipment settings, quality control checks, and batch records. Document any deviations from standard procedures and corrective actions taken to address issues.
- Continuous Improvement: Continuously evaluate and improve labeling and packaging processes based on feedback, performance metrics, and industry best practices. Identify opportunities for optimization, efficiency gains, and cost savings to enhance overall product quality and customer satisfaction.
By following these steps, manufacturers can ensure proper labeling and packaging of the finished automatic plastic lid capping applicator, meeting regulatory requirements, satisfying customer expectations, and preserving product integrity throughout the supply chain.
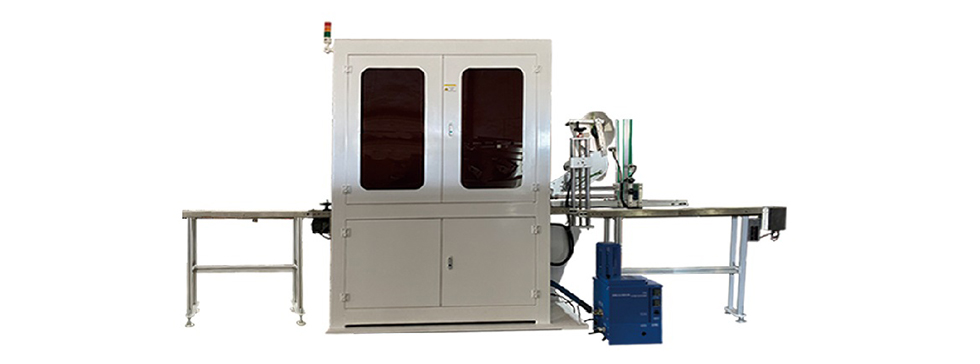
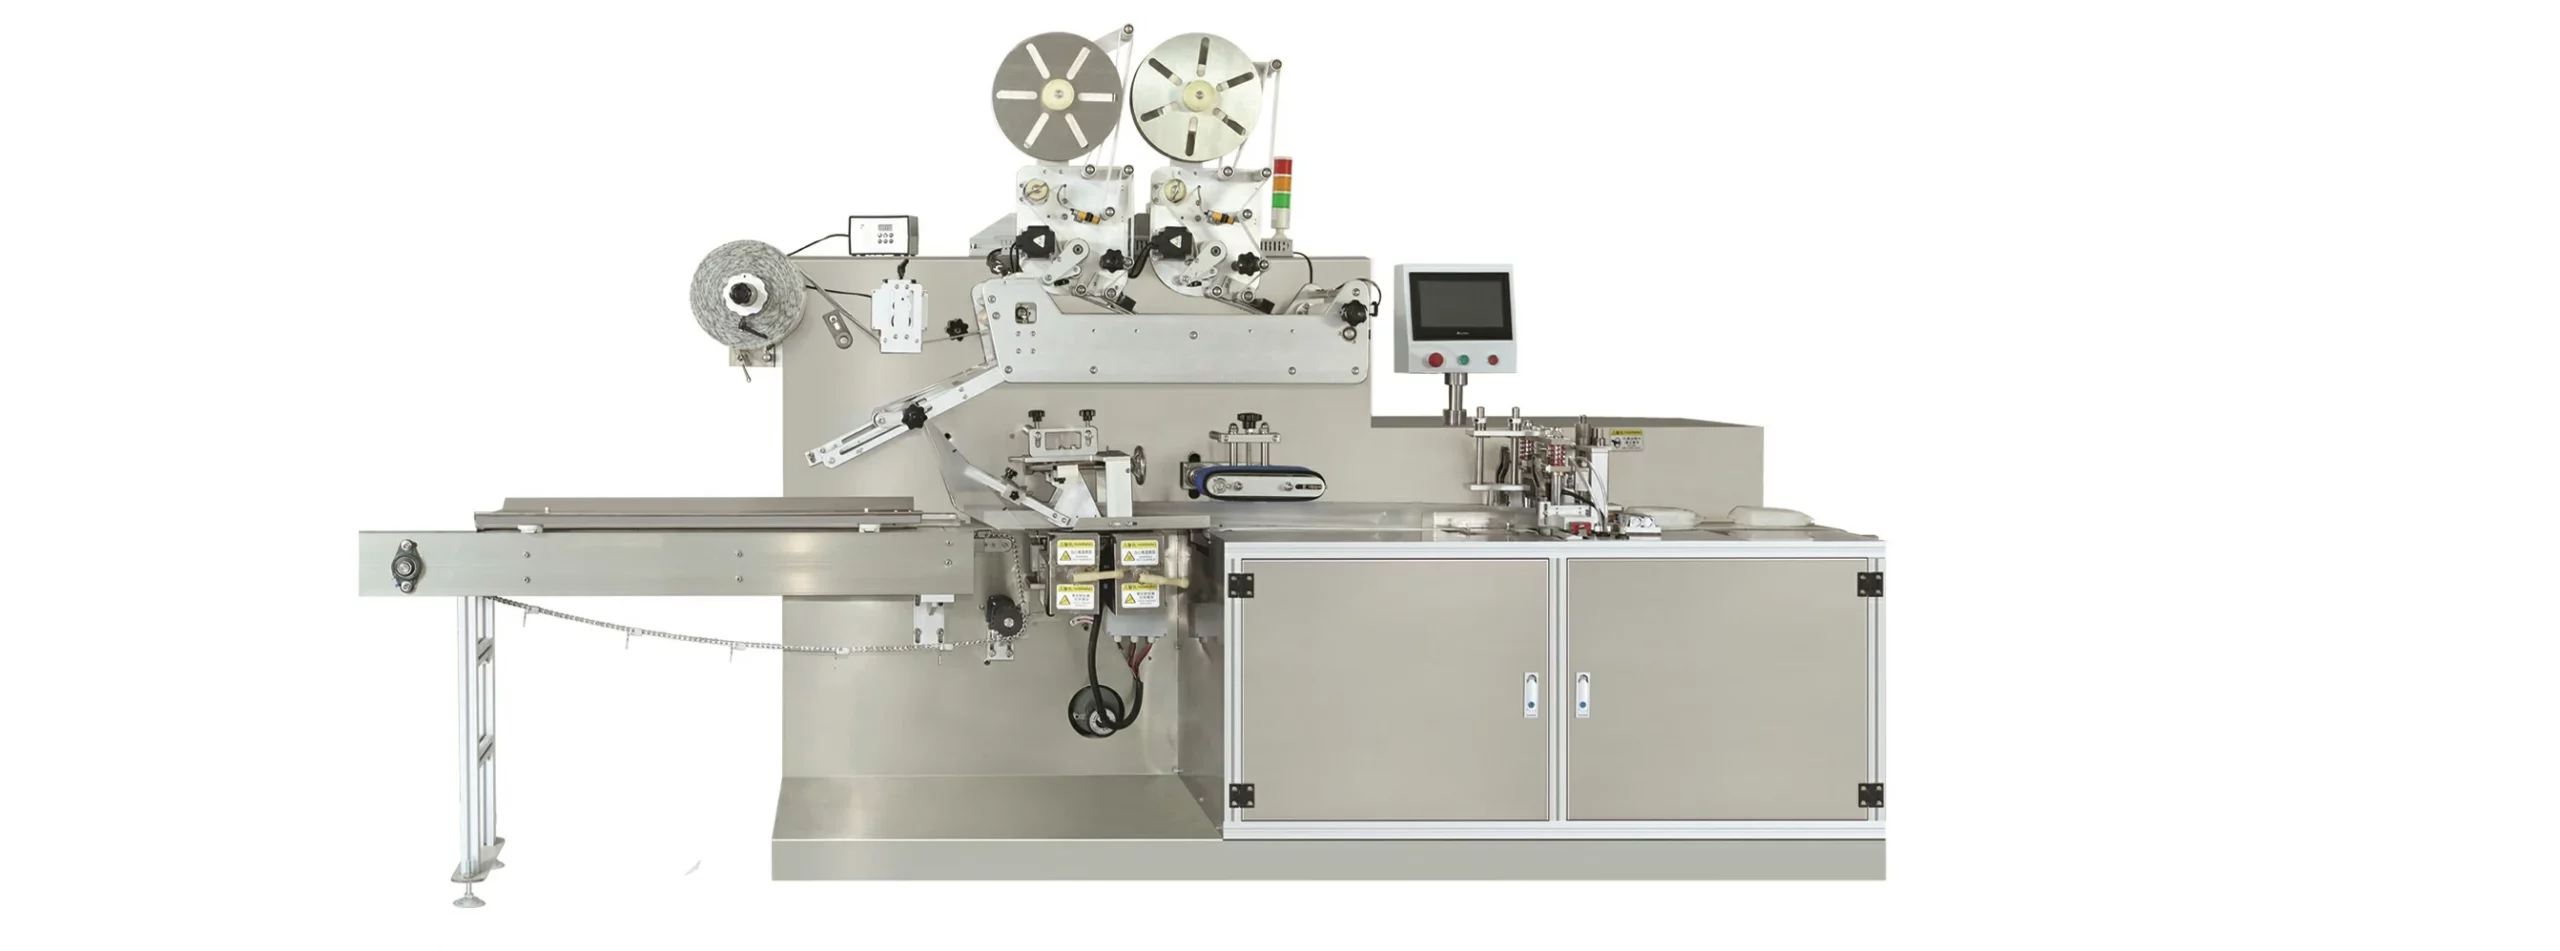
What are the guidelines for safely operating the wipe packaging machine in different environmental conditions?
Safely operating a wipe packaging machine in different environmental conditions requires adherence to specific guidelines to ensure the well-being of operators, maintain equipment integrity, and preserve product quality.
Here are some general guidelines:
- Environmental Assessment: Conduct a thorough assessment of the operating environment to identify potential hazards or challenges that may affect machine performance or operator safety. Consider factors such as temperature fluctuations, humidity levels, dust or debris, and air quality.
- Machine Location: Install the wipe packaging machine in a clean, well-ventilated area with stable environmental conditions. Avoid placing the machine near sources of heat, moisture, or airborne contaminants that could compromise performance or product quality.
- Climate Control: If operating in extreme temperatures or humidity levels, consider implementing climate control measures such as air conditioning, heating, or dehumidification to maintain optimal working conditions for both personnel and equipment.
- Equipment Protection: Install protective barriers or enclosures around the machine to shield it from environmental elements such as dust, moisture, or debris. Use dust covers or air filtration systems to prevent contaminants from entering sensitive components.
- Operator Comfort: Provide operators with appropriate personal protective equipment (PPE) and ergonomic accessories to ensure their comfort and safety in different environmental conditions. This may include temperature-appropriate clothing, respirators, gloves, or eye protection.
- Machine Maintenance: Increase the frequency of machine maintenance and inspection in environments with harsh or fluctuating conditions. Regularly clean and lubricate machine components to prevent corrosion, rust, or damage caused by environmental exposure.
- Material Selection: Choose packaging materials that are resistant to environmental factors such as moisture, UV exposure, or temperature variations. wet wipe cologne wipe packaging machine Ensure that packaging materials maintain their integrity and barrier properties under different environmental conditions.
- Operator Training: Provide comprehensive training to operators on how to safely operate the wipe packaging machine in various environmental conditions. Train them to recognize potential hazards and take appropriate precautions to mitigate risks.
- Emergency Preparedness: Develop emergency response procedures specific to different environmental conditions, such as power outages, extreme weather events, or environmental contamination. Ensure that operators are trained in emergency procedures and know how to respond effectively to unexpected situations.
- Regulatory Compliance: Ensure compliance with regulatory standards and guidelines related to workplace safety, environmental protection, and product quality assurance. Stay informed about relevant regulations and update procedures accordingly to meet compliance requirements.
- Continuous Monitoring: Implement a system for continuous monitoring of environmental conditions and machine performance. Use sensors, alarms, or monitoring systems to detect changes in temperature, humidity, or other environmental factors that may affect machine operation.
- Documentation and Review: Keep detailed records of environmental conditions, machine performance, maintenance activities, and any incidents or issues encountered during operation. Regularly review and analyze this data to identify trends, address potential problems, and improve operational practices.
By following these guidelines, operators can safely and effectively operate a wipe packaging machine in different environmental conditions, ensuring the integrity of the product and the well-being of personnel. Adapting procedures and practices to suit specific environmental challenges is essential for maintaining consistent production quality and efficiency.
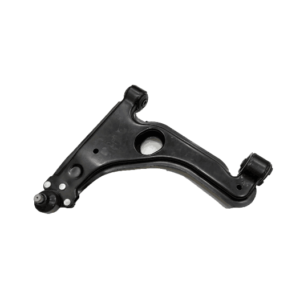
How do control arms contribute to overall vehicle performance and driver confidence?
Control arms play a crucial role in overall vehicle performance and driver confidence by directly impacting several key aspects of the vehicle’s handling, stability, and safety.
Here’s how control arms contribute to these factors:
- Suspension Geometry Control: Control arms help maintain proper suspension geometry by connecting the wheel hubs to the chassis. This ensures consistent wheel alignment, which is essential for predictable handling and steering response. Proper suspension geometry also promotes even tire wear and optimal tire contact with the road surface, enhancing traction and stability.
- Vehicle Stability and Control: Control arms provide structural support and stability to the suspension system, helping to absorb and distribute the forces encountered during cornering, braking, and acceleration. This contributes to a stable and controlled ride, reducing body roll, sway, and unwanted movements, especially during dynamic driving maneuvers.
- Cornering Performance: Control arms play a critical role in optimizing the vehicle’s cornering performance by controlling the movement of the wheels and maintaining proper tire contact with the road surface. High-quality control arms with precise geometry and bushings help minimize body roll and maintain tire grip during cornering, enhancing the vehicle’s agility and responsiveness.
- Braking Efficiency: Control arms affect braking performance by helping to maintain proper wheel alignment and minimize suspension deflection under braking forces. This ensures consistent brake pedal feel, reduced nose dive, and improved stability during braking maneuvers, enhancing overall stopping power and driver confidence.
- Ride Quality and Comfort: Control arms contribute to a smooth and comfortable ride by absorbing road imperfections and vibrations, thanks to their suspension damping characteristics and connection to the vehicle chassis. China Control Arm supplier Well-designed control arms with proper bushings and damping properties help minimize harshness and noise, providing a more enjoyable driving experience.
- Driver Confidence: Reliable and high-quality control arms inspire driver confidence by ensuring predictable and consistent vehicle behavior across various driving conditions. Drivers can trust that their vehicle will respond predictably to steering inputs, maintain stability during evasive maneuvers, and deliver consistent performance, ultimately enhancing driver confidence and peace of mind on the road.
- Safety: Control arms are integral components of the vehicle’s suspension and contribute to overall vehicle safety by maintaining stability, handling, and control. By ensuring proper wheel alignment, tire contact, and suspension dynamics, control arms help prevent loss of control situations and enhance vehicle stability, reducing the risk of accidents and improving occupant safety.
In summary, control arms play a multifaceted role in enhancing overall vehicle performance and driver confidence by optimizing suspension geometry, improving stability and control, enhancing cornering performance, optimizing braking efficiency, providing a comfortable ride, inspiring driver trust, and contributing to overall vehicle safety. Investing in high-quality control arms can significantly improve the driving experience and contribute to a safer and more enjoyable journey.
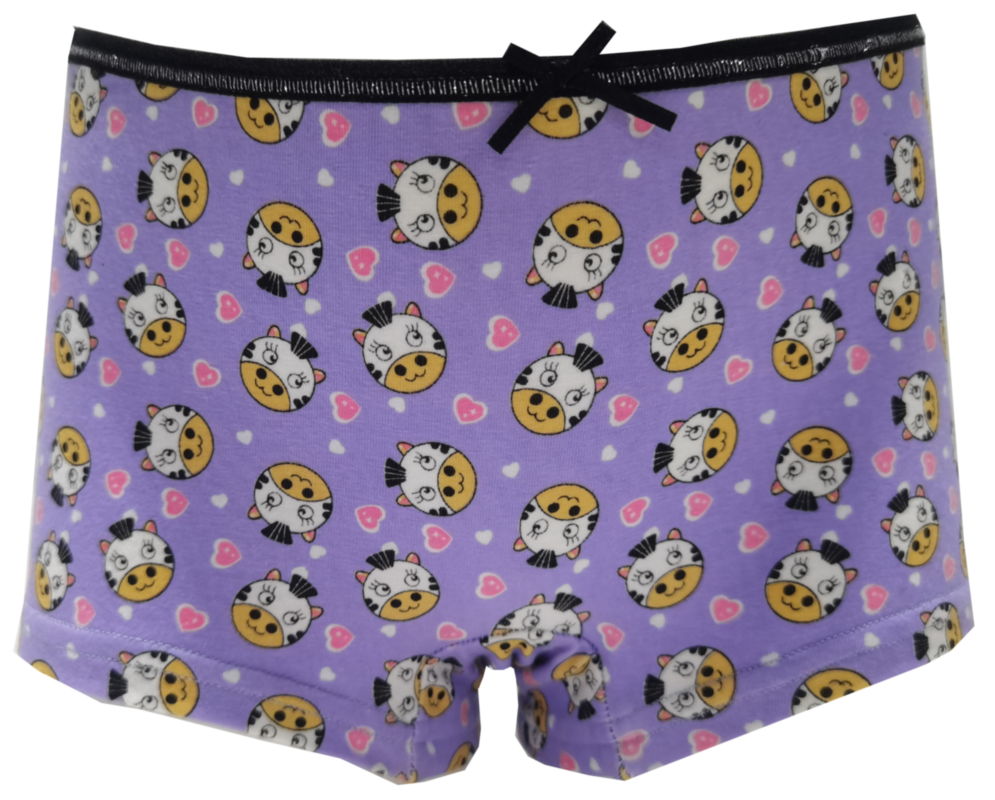
How do different materials affect the feeling of temperature regulation in custom underwear?
Different materials used in custom underwear can have varying effects on temperature regulation, affecting how the body feels in different climates or during various activities.
Here’s how different materials influence temperature regulation:
- Natural Fibers (Cotton, Bamboo, Modal):
- Breathability: Natural fibers are known for their breathability, allowing air to circulate and moisture to evaporate, which helps regulate body temperature. Cotton, bamboo, and modal fabrics are porous and absorbent, making them suitable for warmer climates or activities that induce sweating.
- Thermal Insulation: Natural fibers have insulating properties that help keep the body warm in cooler temperatures by trapping body heat close to the skin. However, they may not provide as much warmth as synthetic fibers in extreme cold conditions.
- Synthetic Fibers (Polyester, Nylon, Spandex):
- Moisture Wicking: Synthetic fibers like polyester and nylon are hydrophobic, meaning they repel moisture and dry quickly. This wicking action helps pull sweat away from the skin, keeping the body dry and cool during physical activity or in hot weather.
- Thermal Regulation: Synthetic fibers may not offer the same breathability as natural fibers, but they can provide effective thermal regulation by wicking moisture away from the body and allowing it to evaporate. China children underwear factory This can help prevent overheating in warm conditions.
- Insulation: Some synthetic blends, particularly those with added insulation or thermal properties, can provide warmth in cooler temperatures without retaining excess moisture.
- Blends (Cotton-Spandex, Bamboo-Polyester):
- Combining Properties: Blending natural and synthetic fibers can combine the benefits of both materials for optimal temperature regulation. For example, cotton-spandex blends offer the breathability of cotton with the stretch and moisture-wicking properties of spandex.
- Versatility: Blended fabrics can be designed to offer a balance of breathability, moisture management, and insulation, making them suitable for a wide range of temperatures and activities.
- Specialty Fabrics (Moisture-Wicking, Thermoregulating):
- Advanced Technologies: Some custom underwear may incorporate specialty fabrics with advanced moisture-wicking or thermoregulating properties. These fabrics are engineered to actively manage temperature and moisture levels, keeping the body comfortable in various conditions.
- Phase Change Materials (PCM): PCM fabrics are designed to absorb, store, and release heat as needed to maintain a stable temperature. They can provide a cooling sensation in warm conditions and retain warmth in cooler temperatures, enhancing overall comfort.
Ultimately, the choice of material in custom underwear depends on individual preferences, climate, and intended use. Whether seeking breathability for hot weather, moisture-wicking for physical activity, or insulation for cooler temperatures, selecting the right material can significantly impact temperature regulation and overall comfort.
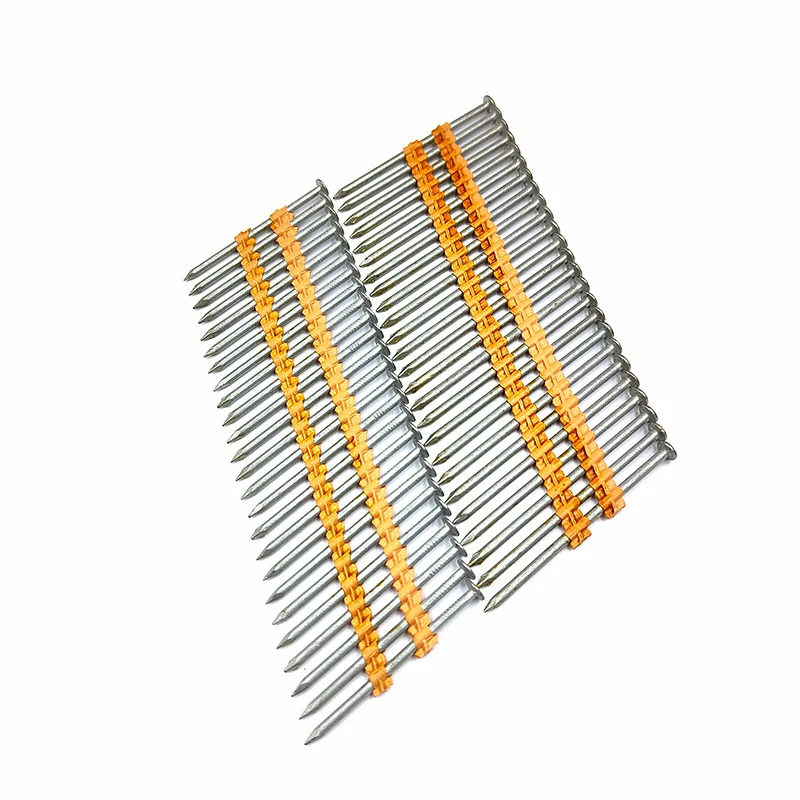
What are the advantages of using clipped head nails over other types of fasteners?
Clipped head nails offer several advantages over other types of fasteners, and these benefits contribute to their popularity in certain applications.
Here are some advantages of using clipped head nails:
- Increased Collation Capacity: Clipped head nails have a clipped or D-shaped head, allowing for a more compact and efficient collation. This design enables a greater number of nails to be loaded into a nail strip or magazine, reducing the frequency of reloading and increasing productivity.
- Faster Nailing Speeds: The design of clipped head nails, combined with their efficient collation, allows for faster nailing speeds. Nail guns that use clipped head nails can drive nails more rapidly, making them suitable for high-volume applications such as framing.
- Reduced Weight: Because the head of a clipped head nail is partially removed, these nails are lighter than their full-headed counterparts. This weight reduction can be advantageous for reducing the overall weight of a nail strip or coil, making handling and maneuvering easier for the user.
- Cost Efficiency: The increased collation capacity and faster nailing speeds contribute to cost efficiency in terms of both time and materials. clipped head nails With fewer interruptions for reloading and higher productivity rates, clipped head nails can be a cost-effective choice for certain projects.
- Improved Nail Placement: The clipped head design allows for closer placement of nails, which can be beneficial in applications where tight spacing is required. This feature is particularly useful in framing and sheathing projects.
- Easier Nail Removal: Clipped head nails often have a smaller footprint, making them potentially easier to remove than nails with larger heads. This can be advantageous when adjustments or repairs are needed in the future.
- Reduced Surface Damage: The smaller head size of clipped head nails may result in less surface damage to the material being fastened. This can be important in applications where a clean and unmarred appearance is desired.
- Compatibility with Certain Nail Guns: Some nail guns are specifically designed to accommodate clipped head nails. If a particular nail gun model is preferred or required for a project, the availability of clipped head nails may influence the fastener choice.
It’s important to note that the choice between clipped head and full round head nails depends on the specific requirements of the project, local building codes, and the type of nail gun being used. Clipped head nails are commonly used in framing and other construction applications where their advantages align with the project’s demands.
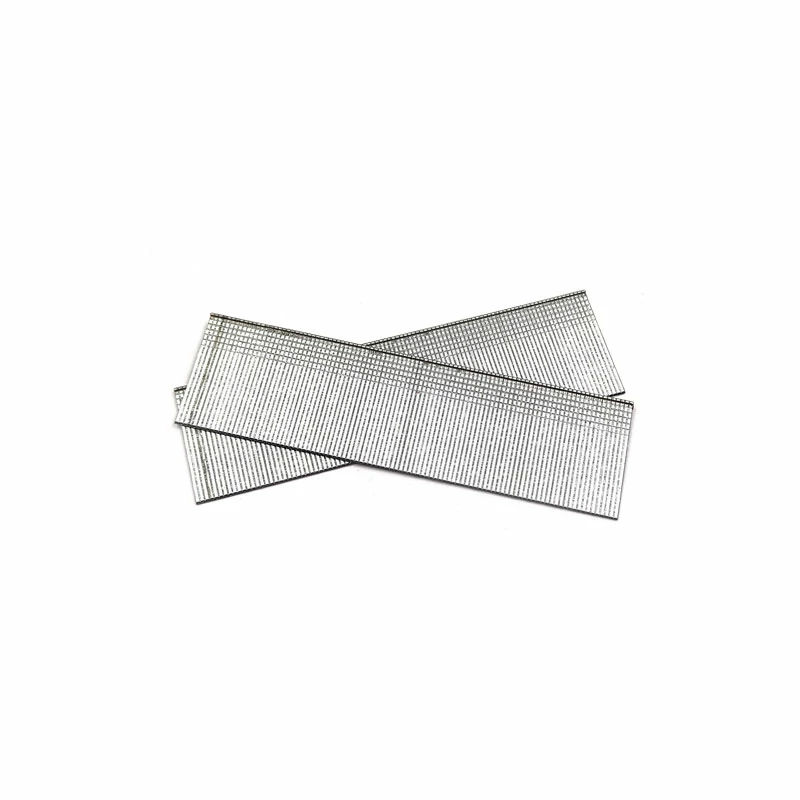
How do you ensure a professional finish when using Brad finishing nails?
To ensure a professional finish when using Brad finishing nails, consider the following tips:
- Select the Right Size and Gauge: Choose Brad finishing nails of the appropriate length and gauge for your project. The size should be suitable for the thickness of the material you are fastening.
- Pre-Drill if Necessary: For hardwoods or materials prone to splitting, pre-drill small pilot holes to guide the Brad finishing nails and reduce the risk of damage.
- Use the Right Tools: Use a quality brad nailer or a hammer with a nail set to drive the nails. Ensure that the tool is properly adjusted for the nail size and material thickness.
- Set the Nail Heads: If using a nail gun, adjust the depth setting to ensure the nail heads are slightly below the surface of the material. If using a hammer, use a nail set to sink the nail heads just below the surface.
- Fill and Sand: After the nails are set, fill the indentations with wood filler or putty that matches the material. Once dry, sand the filled areas to create a smooth and seamless surface.
- Choose the Right Finish: Consider the finish of the Brad finishing nails. Some nails come with coatings that match certain materials or offer corrosion resistance. Choose a finish that complements your project.
- Work Strategically: Plan your nailing pattern to achieve a clean and professional appearance. Space the nails evenly and align them with precision, brad finishing nails especially when attaching trim or molding.
- Use the Right Angle: Hold the nailer or hammer at the correct angle when driving the nails. This helps prevent bending and ensures the nails go in straight.
- Minimize Handling Marks: Handle the material carefully to avoid leaving fingerprints or smudges. Use clean hands or wear gloves to prevent transferring oils or dirt to the surface.
- Finish with the Right Sealant or Paint: After sanding, apply the appropriate sealant, primer, or paint to match the overall finish of your project. This helps blend the filled areas with the surrounding material.
- Inspect and Touch Up: Once the finish has dried, inspect the project for any imperfections. Touch up any areas that may need additional filler, sanding, or paint for a flawless finish.
By paying attention to these details and taking the time to finish the project carefully, you can achieve a polished and professional look when using Brad finishing nails.
How does the assembly contribute to operator safety and machine stability on slopes?
The track adjuster assembly in an excavator plays a significant role in contributing to operator safety and machine stability, especially when operating on slopes.
Here are several ways in which the track adjuster assembly contributes to safety and stability on slopes:
- Maintaining Optimal Track Tension:
- The track adjuster assembly ensures that the tracks are properly tensioned. Optimal track tension is crucial for maintaining traction and stability on slopes, preventing issues such as track slippage or derailment.
- Preventing Track Slippage:
- By maintaining proper tension, the track adjuster assembly helps prevent track slippage, especially when navigating slopes. This is essential for maintaining control and preventing accidents that could result from tracks losing grip on the terrain.
- Ensuring Consistent Ground Contact:
- The assembly contributes to consistent and effective ground contact for all tracks. This is particularly important on slopes where uneven ground can challenge stability. Consistent ground contact helps distribute the machine’s weight evenly, enhancing stability.
- Mitigating Rolling and Pitching Movements:
- Properly tensioned tracks, facilitated by the track adjuster assembly, contribute to mitigating rolling and pitching movements on slopes. This helps in maintaining a level and stable platform for the excavator, reducing the risk of tipping or sliding.
- Enhancing Traction:
- The track adjuster assembly supports optimal track tension, ensuring that the excavator maintains strong traction on slopes. This is crucial for preventing loss of control and improving the machine’s ability to ascend or descend slopes safely.
- Improving Maneuverability:
- A well-adjusted track system, facilitated by the track adjuster assembly, improves the overall maneuverability of the excavator on slopes. China excavator track roller factory The operator can more effectively control the machine’s movements, reducing the likelihood of accidents.
- Reducing Track Wear on Slopes:
- Proper tensioning of tracks on slopes helps reduce uneven wear, ensuring that tracks wear uniformly. This not only contributes to machine stability but also extends the overall lifespan of the tracks.
- Adapting to Changing Slope Conditions:
- The track adjuster assembly allows for adjustments to track tension based on the slope conditions. This adaptability is important for maintaining stability as the machine operates on varying slopes with different degrees of incline.
- Operator Comfort and Control:
- A stable and well-maintained track system enhances operator comfort and control, particularly when working on slopes. This contributes to improved concentration and reduces the likelihood of accidents caused by unstable machine behavior.
- Reducing the Risk of Tip-Over:
- Proper track tension, facilitated by the track adjuster assembly, is crucial for preventing tip-over incidents on slopes. The assembly helps maintain a lower center of gravity and balanced weight distribution, reducing the risk of the excavator tipping over.
- Compliance with Safety Standards:
- The track adjuster assembly ensures that the excavator operates within recommended tension parameters as specified by safety standards and manufacturer guidelines. This compliance contributes to overall safety on slopes.
- Preventing Excessive Wear and Tear:
- By preventing track slippage and ensuring consistent ground contact, the track adjuster assembly helps minimize excessive wear and tear on tracks. This is important for maintaining the integrity of the undercarriage components and overall machine stability.
In summary, the track adjuster assembly is a critical component that directly impacts the safety and stability of an excavator, particularly when operating on slopes. Through proper tensioning and maintenance, the assembly contributes to a stable platform, optimal traction, and enhanced operator control, all of which are essential for safe and efficient operation in challenging terrain.
What role does the track adjuster assembly play in minimizing track-induced vibrations on the excavator frame?
The track adjuster assembly in an excavator plays a crucial role in minimizing track-induced vibrations on the excavator frame.
Here are several ways in which the track adjuster assembly contributes to reducing vibrations:
- Optimal Track Tension:
- The track adjuster assembly ensures that the tracks are properly tensioned. Adequate track tension is essential for maintaining proper alignment and reducing vibrations caused by loose or excessively tight tracks.
- Vibration Damping:
- Some track adjuster assemblies are designed with features that provide vibration damping. This can include components that absorb and dissipate vibrations generated during excavator operation.
- Maintaining Track Alignment:
- Proper tensioning by the track adjuster assembly helps in maintaining the correct alignment of the tracks. Misaligned tracks can lead to uneven wear and increased vibrations. The assembly ensures that the tracks stay aligned, minimizing vibrations.
- Reduced Track Slippage:
- The track adjuster assembly helps prevent track slippage by maintaining the appropriate tension. Reduced slippage contributes to smoother operation and helps minimize vibrations transmitted to the excavator frame.
- Enhanced Stability:
- By maintaining optimal track tension, the track adjuster assembly contributes to the overall stability of the excavator. A stable machine is less prone to vibrations induced by uneven terrain or challenging operating conditions.
- Preventing Excessive Wear:
- Properly tensioned tracks experience less wear and tear. Excessive wear on tracks can lead to irregularities and vibrations. China excavator track adjuster assembly factory The track adjuster assembly helps prevent premature wear, thereby minimizing vibrations.
- Improved Ground Contact:
- The track adjuster assembly ensures that the tracks maintain consistent and effective contact with the ground. This is crucial for stability and reducing the likelihood of vibrations caused by uneven or irregular ground surfaces.
- Operator Comfort:
- Minimizing vibrations is not only important for the excavator’s structural integrity but also for the comfort of the operator. A well-adjusted track system, facilitated by the track adjuster assembly, contributes to a smoother ride, reducing operator fatigue and discomfort.
- Mitigation of Impact Forces:
- The track adjuster assembly helps absorb and distribute impact forces encountered during excavation. By mitigating these forces, the assembly contributes to reducing the transmission of vibrations to the excavator frame.
- Balanced Tension Across Tracks:
- The track adjuster assembly ensures that tension is balanced across all tracks. Balanced tension contributes to uniform loading and reduces the likelihood of vibrations caused by uneven forces on different tracks.
- Compliance with Manufacturer Specifications:
- Proper installation and adjustment of the track adjuster assembly in accordance with the manufacturer’s specifications are critical. Adhering to these guidelines ensures that the assembly functions optimally in minimizing vibrations.
Overall, the track adjuster assembly is a key component that contributes to the smooth and stable operation of an excavator. By maintaining optimal track tension, reducing track slippage, and promoting proper alignment, the assembly helps minimize vibrations transmitted to the excavator frame, enhancing both machine performance and operator comfort.

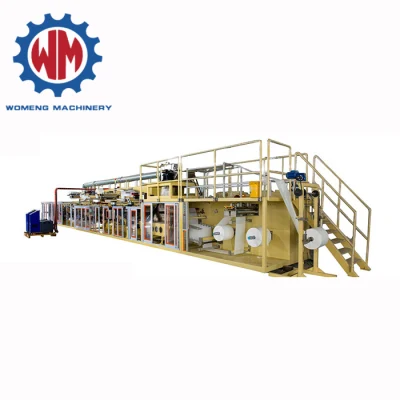
How is the machine programmed to handle different diaper sizes and styles?
Programming a diaper-making machine to handle different sizes and styles involves configuring various parameters and settings to meet the specifications of each diaper variant. This programming is typically done through a control system, often using Programmable Logic Controllers (PLCs) or other computerized interfaces.
Here’s an overview of the steps involved:
- User Interface:
- The machine is equipped with a user interface, which could be a touch screen or a computerized panel. Operators use this interface to input parameters and select the desired diaper size and style.
- Product Specifications:
- Operators enter the specific product specifications for each diaper size and style into the machine’s control system. This includes dimensions, materials, cutting patterns, and any other relevant details.
- PLC Programming:
- The PLC, or a similar control system, is programmed to execute the production process based on the entered specifications. Programming involves defining sequences of actions, such as material feeding, cutting, bonding, and folding, according to the requirements of the selected diaper size and style.
- Material Feeding Adjustments:
- Parameters related to material feeding systems are adjusted based on the diaper specifications. This includes settings for the width and thickness of materials used in different parts of the diaper, such as the absorbent core and backsheet.
- Cutting Mechanism:
- The cutting mechanism is programmed to create the specific shapes and sizes required for each diaper variant. Adjustments are made to cutting dimensions, blade positioning, and any other relevant parameters.
- Bonding and Sealing Settings:
- Parameters for bonding and sealing mechanisms are configured based on the diaper style. This includes adjustments to temperature, diaper production line pressure, and duration of bonding processes, ensuring proper adhesion of materials.
- Elastic Application (if applicable):
- If the diaper style requires elastic features, the programming includes settings for elastic application. This may involve adjusting the positioning and tension of elastic materials during the production process.
- Folding Configuration:
- The folding mechanism is programmed to create the specific fold configuration for each diaper size and style. This involves adjusting folding angles, dimensions, and any other parameters related to the folding process.
- Quality Control Checks:
- Programming includes instructions for quality control checks at various stages of production. Sensors and cameras are programmed to inspect the diapers for defects, ensuring that each product meets the specified standards.
- Automated Changeover (Optional):
- Advanced diaper-making machines may have automated changeover features that allow for seamless transitions between different diaper sizes and styles. This involves quick adjustments of settings without significant downtime.
- Product Counting and Packaging Configuration:
- If the machine is equipped with automated counting and packaging systems, programming includes configurations for counting the correct number of diapers per pack and arranging them according to the specified packaging style.
- Barcode or Batch Coding (Optional):
- For traceability and inventory management, programming may include the addition of barcodes or batch codes to the diapers. This information is often printed or applied during the production process.
- Documentation and Recipe Management:
- The machine’s control system may include features for documentation and recipe management. This allows operators to save and recall settings for different diaper sizes and styles, streamlining the setup for future production runs.
By carefully programming the diaper-making machine, manufacturers can achieve flexibility in production, efficiently transitioning between different diaper sizes and styles without compromising quality. This adaptability is essential to meet diverse market demands and offer a range of products to consumers.