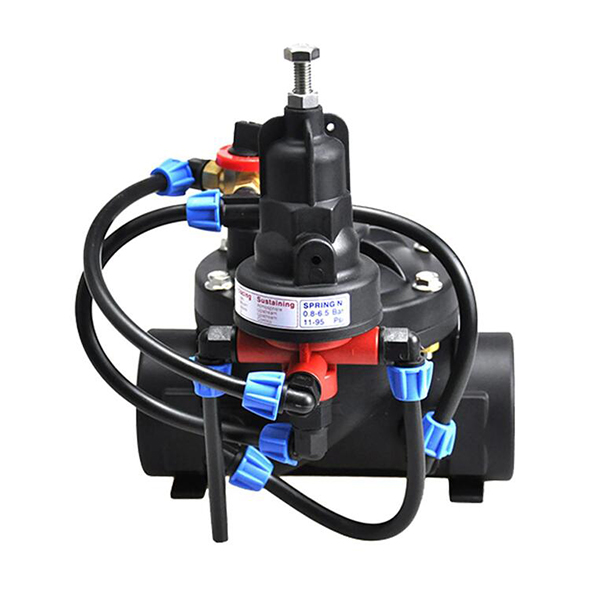
How do you install a pressure reducing valve in a plumbing system?
Installing a pressure reducing valve (PRV) in a plumbing system involves the following steps:
Gather Required Tools and Materials: Before starting the installation, gather the necessary tools and materials, including a pressure reducing valve, pipe wrenches, Teflon tape, pipe cutter, soldering equipment (if applicable), flux, and solder.
Locate the Installation Point: Identify the appropriate location for installing the PRV in the plumbing system. It is typically installed near the main water supply line, after the main shut-off valve.
Shut off the Water Supply: Turn off the main water supply to the building. This can usually be done at the water meter or the main shut-off valve.
Drain the Plumbing System: Open a faucet at the lowest point in the building to drain any remaining water from the plumbing system. This will help prevent water from flowing during the installation process.
Measure and Cut the Pipe: Measure the section of the pipe where the PRV will be installed. Use a pipe cutter to make a clean and straight cut at the designated location. Ensure that the cut is perpendicular to the pipe.
Prepare the Pipe Ends: Remove any burrs or sharp edges from the cut pipe ends using a deburring tool or a file. This will ensure a proper connection with the PRV.
Install the PRV: Apply Teflon tape to the male threads of the PRV to create a tight seal. Insert the PRV between the cut ends of the pipe and align it correctly. Use pipe wrenches to tighten the connections, ensuring a secure fit.
Connect the PRV to the Pipe: If the plumbing system uses copper pipes, solder the connections using a soldering torch, flux, and solder. Pressure Reducing Valve Follow proper soldering techniques and allow the joints to cool before proceeding.
Adjust the Pressure Setting: Some PRVs have an adjustable pressure setting. Refer to the manufacturer’s instructions to adjust the pressure to the desired level. Use a pressure gauge to monitor and verify the pressure adjustment.
Test the System: Turn on the main water supply and check for any leaks around the PRV. Also, check if the PRV is effectively reducing the incoming water pressure to the desired level. Adjustments may be necessary if the pressure is not within the desired range.
It’s important to note that the installation process may vary depending on the specific PRV model and the plumbing system configuration. Always refer to the manufacturer’s instructions and guidelines for detailed installation procedures and any specific considerations for your PRV model. If you are not comfortable with the installation process, it is advisable to seek the assistance of a qualified plumber.
What maintenance is required for pressure reducing valves?
Pressure reducing valves (PRVs) generally require minimal maintenance. However, regular inspections and occasional maintenance tasks can help ensure their optimal performance.
Here are some maintenance activities that may be required for PRVs:
Visual Inspection: Periodically inspect the PRV for any signs of leaks, corrosion, or physical damage. Look for water seepage around the valve body, connections, or fittings. If any issues are identified, take appropriate action, such as tightening loose connections or replacing damaged parts.
Pressure Adjustment: If your PRV has an adjustable pressure setting, you may need to periodically check and adjust the pressure as needed. Use a pressure gauge to measure the downstream pressure and compare it to the desired pressure range. Adjust the PRV if the pressure is outside the desired range.
Cleaning and Flushing: Over time, debris, sediment, or mineral deposits may accumulate in the PRV, affecting its performance. Cleaning the valve and associated pipes periodically can help maintain proper operation. Follow manufacturer guidelines to safely clean the PRV and associated plumbing components.
Testing and Functionality Check: Occasionally, test the PRV to ensure it is functioning correctly. Monitor the downstream pressure and verify that the PRV is reducing the incoming pressure to the desired level. If you notice any irregularities or inconsistent pressure, consider servicing or replacing the PRV.
System-wide Maintenance: In addition to PRV-specific maintenance, it is essential to maintain the overall plumbing system. Regularly inspect and maintain other components, such as water filters, pressure gauges, and shut-off valves. Address any issues promptly to prevent potential problems with the PRV.
Follow Manufacturer Guidelines: Always refer to the manufacturer’s maintenance instructions and guidelines specific to your PRV model. Manufacturers may provide additional maintenance recommendations or specify the recommended maintenance intervals for their products.
Remember that the maintenance requirements can vary depending on the specific PRV model, water quality, and system conditions. It is advisable to consult a professional plumber or follow the manufacturer’s recommendations for the most accurate and appropriate maintenance procedures for your PRV.

Comments are Disabled